使用Cloudflare Worker搭建Telegram Bot Api 代理
前言
因为Telegram的api在国内无法访问,所以一般都需要使用代理。本文使用CloudflareWorker部署Api代理(主要是能白嫖)。
开始操作
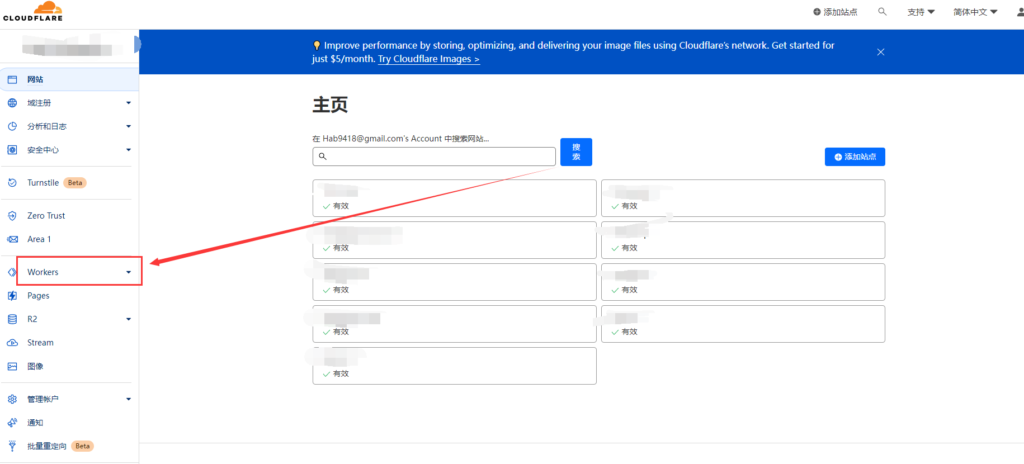
1. 点击左侧Worker
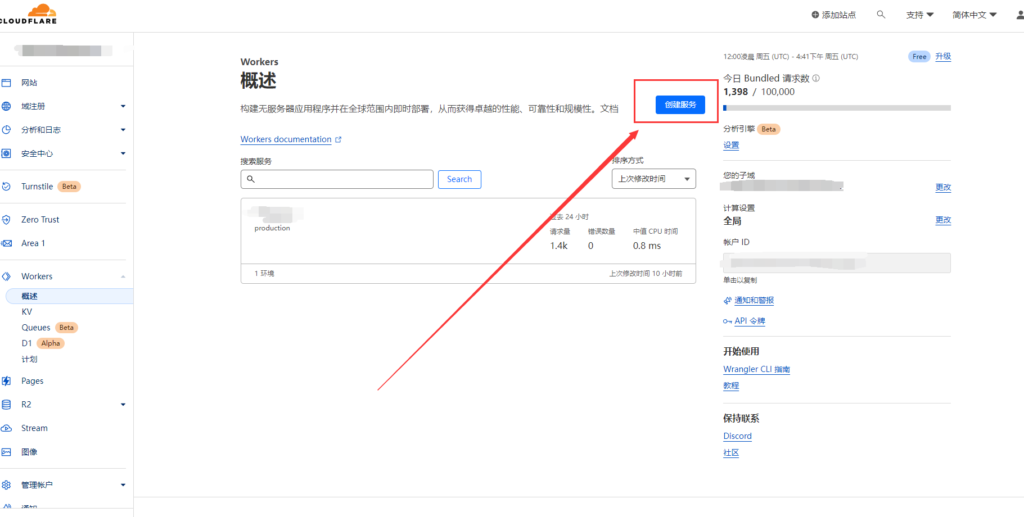
2. 创建服务
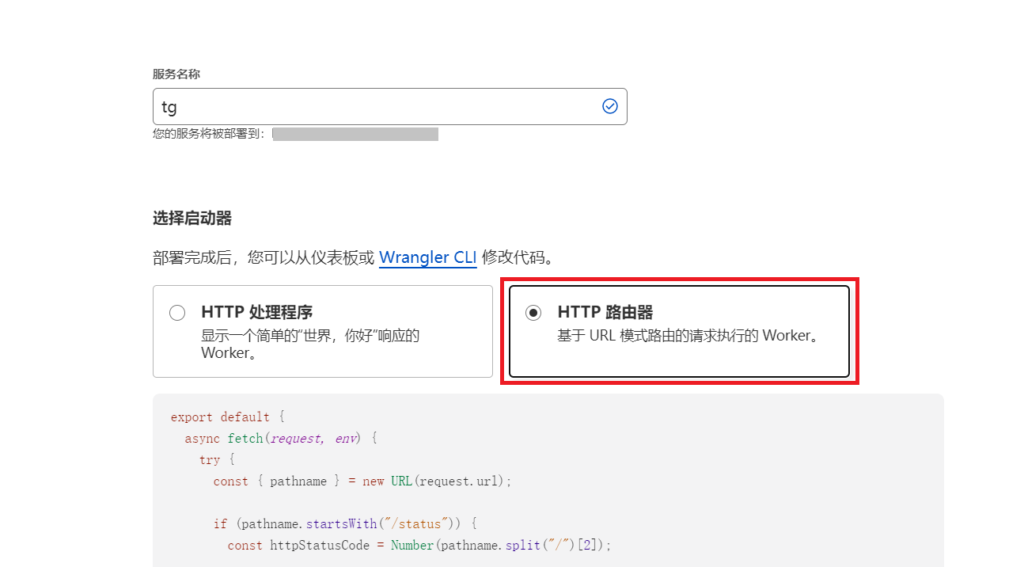
名称随便填写,启动器选择HTTP路由器
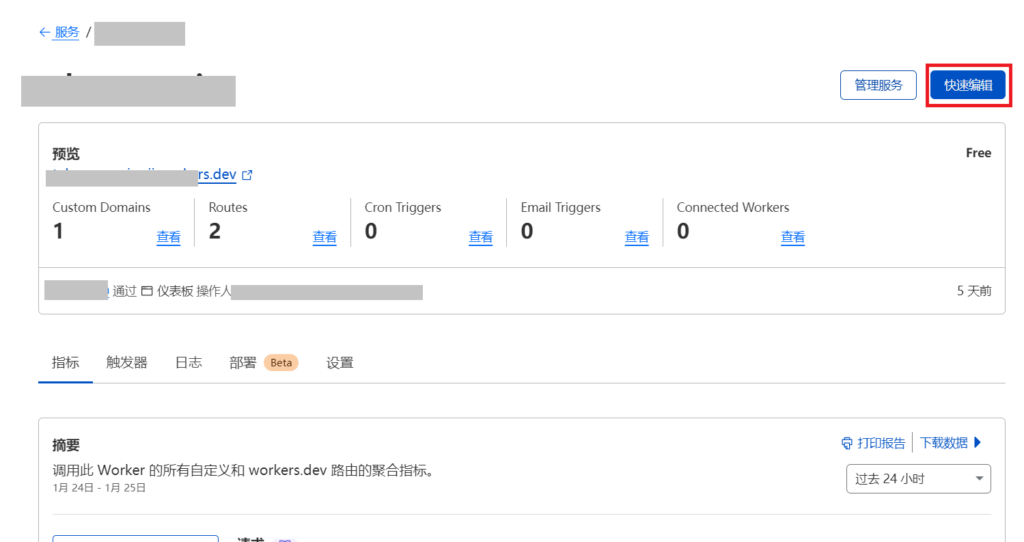
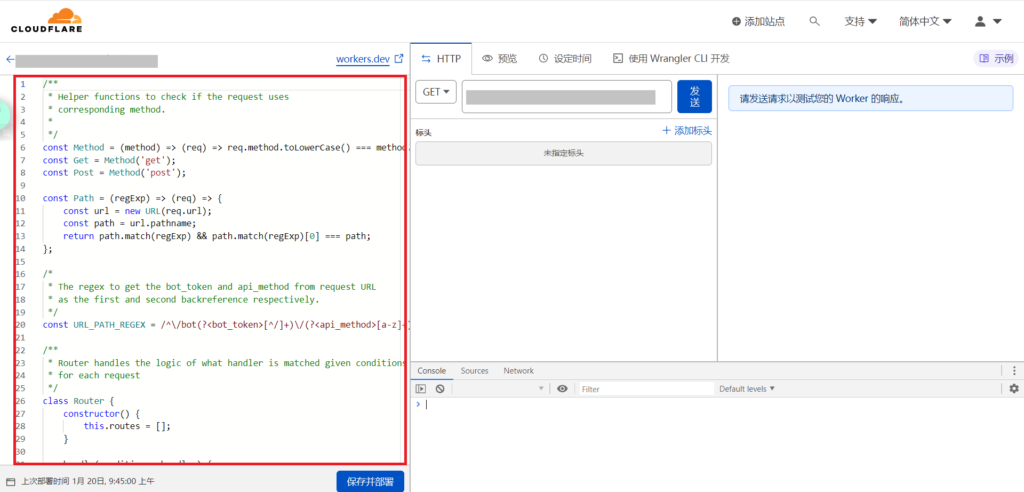
3. 编辑代码
删除红框处所有的代码,填入以下代码
代码:
/**
 * Helper functions to check if the request uses
 * corresponding method.
 *
 */
const Method = (method) => (req) => req.method.toLowerCase() === method.toLowerCase();
const Get = Method('get');
const Post = Method('post');

const Path = (regExp) => (req) => {
    const url = new URL(req.url);
    const path = url.pathname;
    return path.match(regExp) && path.match(regExp)[0] === path;
};

/*
 * The regex to get the bot_token and api_method from request URL
 * as the first and second backreference respectively.
 */
const URL_PATH_REGEX = /^\/bot(?<bot_token>[^/]+)\/(?<api_method>[a-z]+)/i;

/**
 * Router handles the logic of what handler is matched given conditions
 * for each request
 */
class Router {
    constructor() {
        this.routes = [];
    }

    handle(conditions, handler) {
        this.routes.push({
            conditions,
            handler,
        });
        return this;
    }

    get(url, handler) {
        return this.handle([Get, Path(url)], handler);
    }

    post(url, handler) {
        return this.handle([Post, Path(url)], handler);
    }

    all(handler) {
        return this.handler([], handler);
    }

    route(req) {
        const route = this.resolve(req);

        if (route) {
            return route.handler(req);
        }

        const description = 'No matching route found';
        const error_code = 404;

        return new Response(
            JSON.stringify({
                ok: false,
                error_code,
                description,
            }),
            {
                status: error_code,
                statusText: description,
                headers: {
                    'content-type': 'application/json',
                },
            }
        );
    }

    /**
     * It returns the matching route that returns true
     * for all the conditions if any.
     */
    resolve(req) {
        return this.routes.find((r) => {
            if (!r.conditions || (Array.isArray(r) && !r.conditions.length)) {
                return true;
            }

            if (typeof r.conditions === 'function') {
                return r.conditions(req);
            }

            return r.conditions.every((c) => c(req));
        });
    }
}

/**
 * Sends a POST request with JSON data to Telegram Bot API
 * and reads in the response body.
 * @param {Request} request the incoming request
 */
async function handler(request) {
    // Extract the URl method from the request.
    const { url, ..._request } = request;

    const { pathname: path, search } = new URL(url);

    // Leave the first match as we are interested only in backreferences.
    const { bot_token, api_method } = path.match(URL_PATH_REGEX).groups;

    // Build the URL
    const api_url = 'https://api.telegram.org/bot' + bot_token + '/' + api_method + search;

    // Get the response from API.
    const response = await fetch(api_url, _request);

    const result = await response.text();

    const res = new Response(result, _request);

    res.headers.set('Content-Type', 'application/json');

    return res;
}

/**
 * Handles the incoming request.
 * @param {Request} request the incoming request.
 */
async function handleRequest(request) {
    const r = new Router();
    r.get(URL_PATH_REGEX, (req) => handler(req));
    r.post(URL_PATH_REGEX, (req) => handler(req));

    const resp = await r.route(request);
    return resp;
}

/**
 * Hook into the fetch event.
 */
addEventListener('fetch', (event) => {
    event.respondWith(handleRequest(event.request));
});
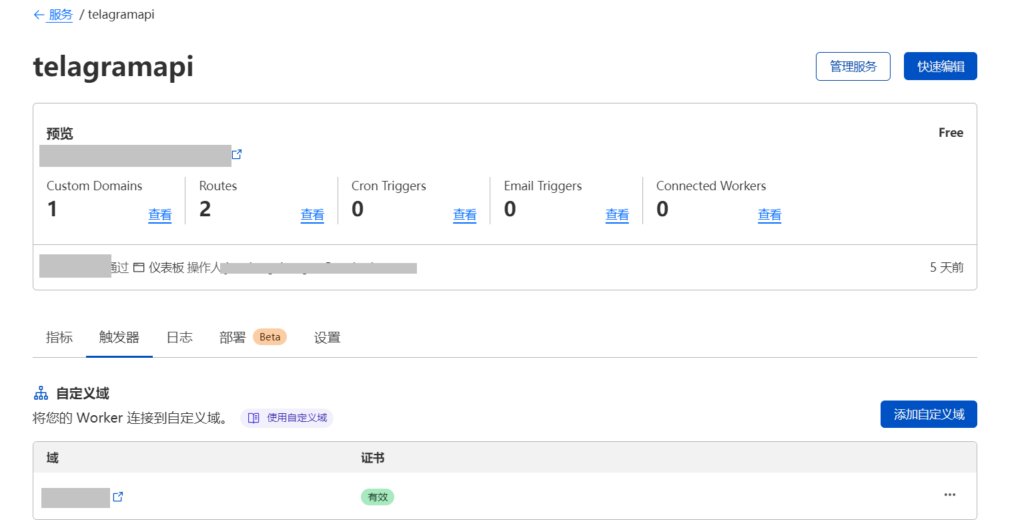
然后保存并部署,之后可以在触发器中添加自己的域名,点击添加自定义域
如何使用
Tg bot的api是
这个地址需要外网访问
https://api.telegram.org/bot<bot的token>/sendMessage?chat_id=<tg用户的id>&text=<发送内容>
将上面的参数替换成你自己的参数,如果你的账号可以收到新的消息表示你的机器人bot创建是正常的
上面的地址如果可以正常收到消息,再访问下面这个地址
这个地址在国内就可以访问
https://tg.你的域名/bot<bot的token>/sendMessage?chat_id=<tg用户的id>&text=<发送内容>
以上就完成了Cloudflare反向代理Tg bot,通过Cloudflare还可以反向代理谷歌等网址,参考链接里面有例子,具体需要自行了解

